# |
Step |
Output |
1 |
Accessing Vouch through Web involves two-way authentication. You need to create a web account wherein you provide Vouch access credentials. Once web account is created successfully, you can access Vouch through your web account directly.
This process assumes that you have already prepared Vouch for end-user use through VouchCloudClient for desktop. You already have in place one of the three <MobileWebKeys> you generated at the time of <InitialyzeUpdate> process of VCAMI, Vouch user and password belonging to you.
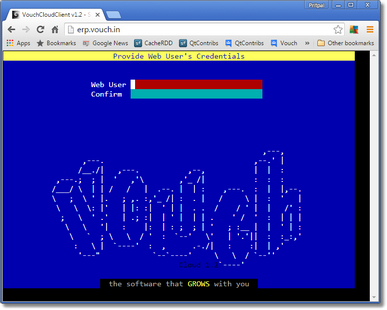
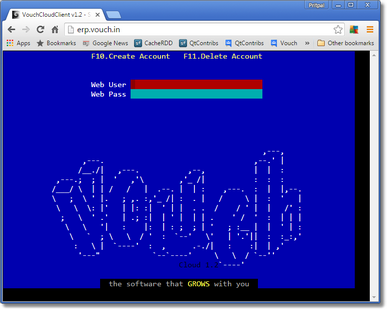
Enter "erp.vouch.in" in your default browser's navigation field. You will be presented a screen like on the right. You are ready to log-in Vouch through your web account. But if you have not created web account yet, press <F10> to create an account. |
|
2 |
If you have pressed <F10> to create a new web account, then you are presented the screen at the right.
|
|
3 |
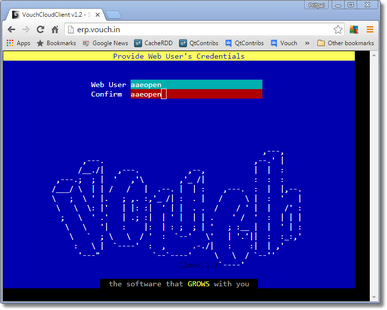
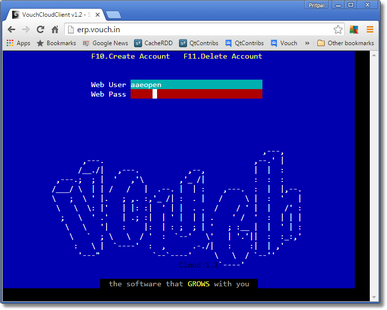
You are asked to provide a web user name. It is case insensitive. Also web user name is glovbally unique. You can use any name but it is always better if you use your email address which is supposed to be globally unique. Though you are not limited to that.
You will be asked to confirm the web user name by retyping it.
Uniqueness of web user name is established at this point. You will be notified if this name is already consumed.
Once established that this name can be awarded to you, you need to provide web password explained in step#4. |
|
4 |
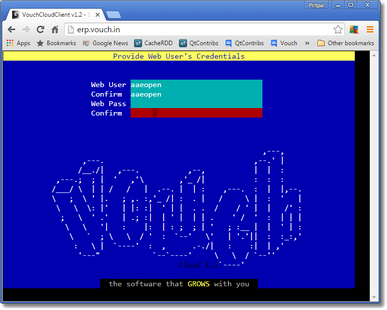
Provide a strong web password. And then confirm it by retyping.
Your account is not created as yet. You need to provide Vouch credentials still. Follow step#5. |
|
5 |
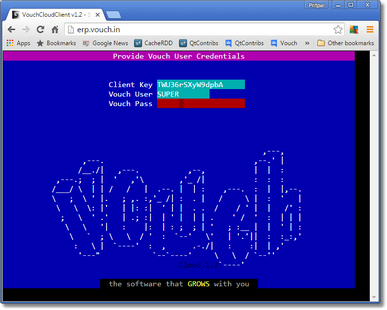
Grab one of the 3 keys you might have added when initializing your account via VCAMI. If not, then reach to VCAMI through admininstrative .key, add the keys through <MobileWebKeys>, and then <InitializeUpdate> your account. Note down one of the keys which you intend to provide to this Vouch user to access Vouch through the web.
Do not enter <Client Key> manually. Instead copy it on the clipboard and paste in the field with pressing SHIFT+CTRL+V keys together. Entering it manually may lead to errors which cannot be determined at this point of time. Also match the entered client key with the key you have on record. This key is 15 characters long. Count the characters also.
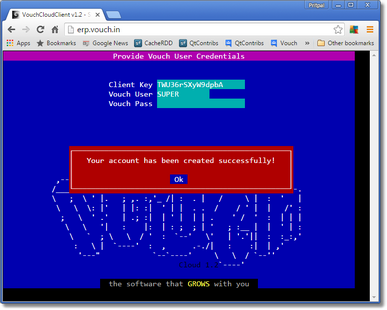
Also provide Vouch username and password. |
|
6 |
On successful completion of all steps you will be notified that your web accounts has been created successfully. |
|
7 |
You will be returned back to the web login screen. |
|
8 |
Provide the web username and password you just created. |
|
9 |
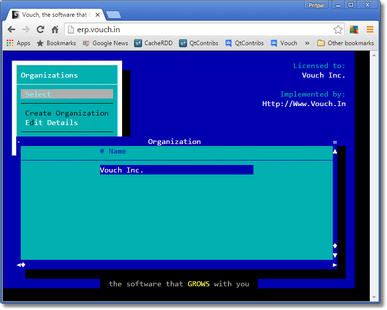
You have reached the Vouch's login screen. Now onwards you will be dealing with Vouch as if you would do normally through desktop client. The only difference will be that you are accessing full-blown Vouch through the Web interface instead of desktop window.
Press <Enter> on Select. |
|
10 |
Choose the organization you wish to enter. |
|
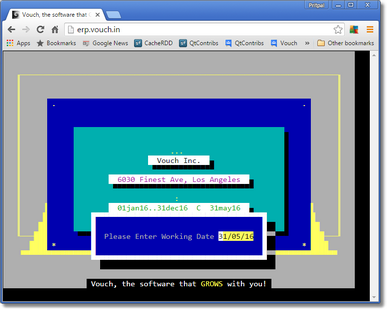
11 |
Adjust current working date if you so wish or leave the current system date as working date.
Press <Enter>... |
|
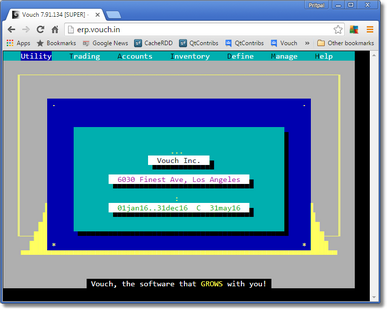
12 |
And you are on the Vouch's action center, i.e., main screen. |
|