# |
Step |
Output |
10 |
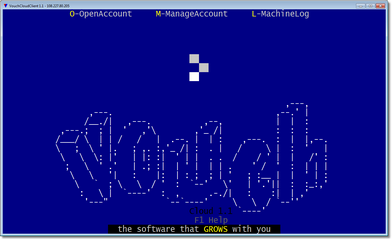
Invoke VouchCloudClient, either by clicking on desktop icon or by executing VouchCli.exe inside install folder, you will be presented with welcome screen.
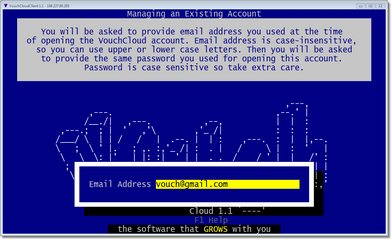
Press "M" and you will enter "Manage an Existing Account" mode. |
|
11 |
Enter the email address you provided when opening VouchCloud account. The address is case insensitive. Upper or lower, both cases are supported. |
|
12 |
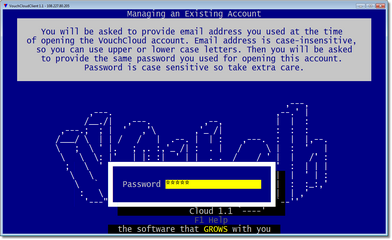
Enter the password you provided when opening the VouchCloud account. Note that password is case sensitive. |
|
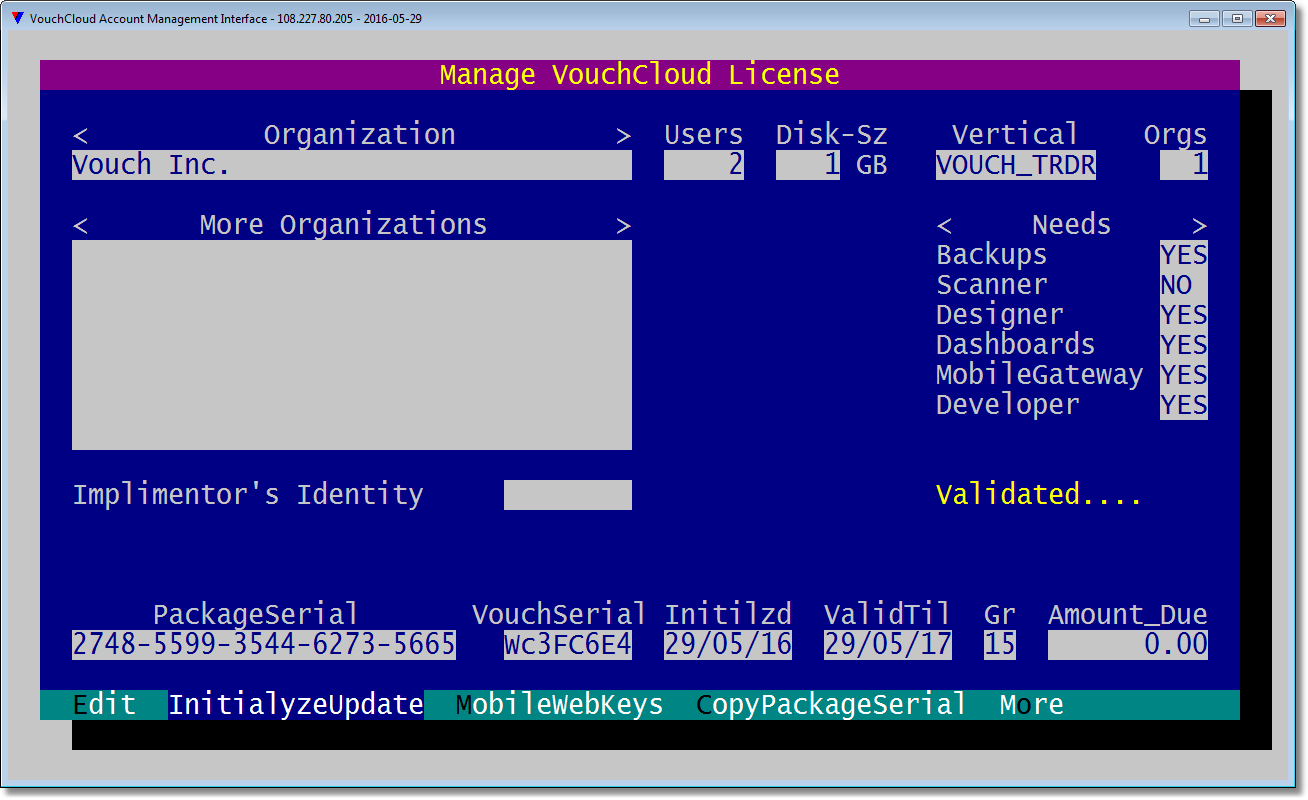
13 |
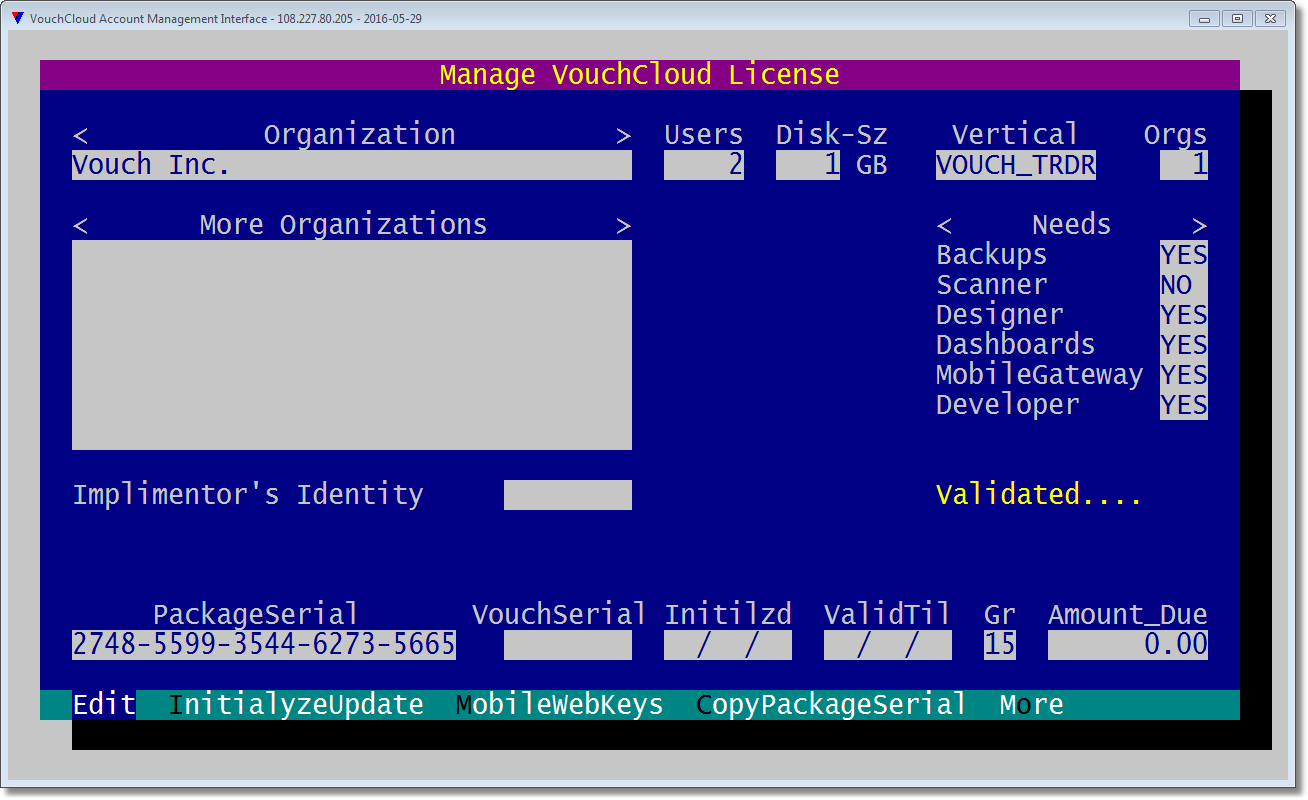
You have reached the VouchCloud Account Management Interface (VCAMI). Depending upon whether this account has already been validated or not, you will see a note on right-middle of the console as "Not Validated", as in the image at the right, or, "Validated..." as in the image below the image at the right.
Your account is pending for validation.
At this point either wait for few more minutes if you have already sent the email or email the PackageSerial again to vouch@vouch.in and wait.
You can always return to this screen anytime in the future. |
|
14 |
Your account has been validated.
At this point you are ready to <Initialyze> or update this account.
Here <Initialize> is used synonymously for initializing a new account or updating an existing account.
WAIT ! You might be interested in having mobile and/or web access to your data. If that's true then follow the next few steps and add keys needed for web/mobile access. |
|
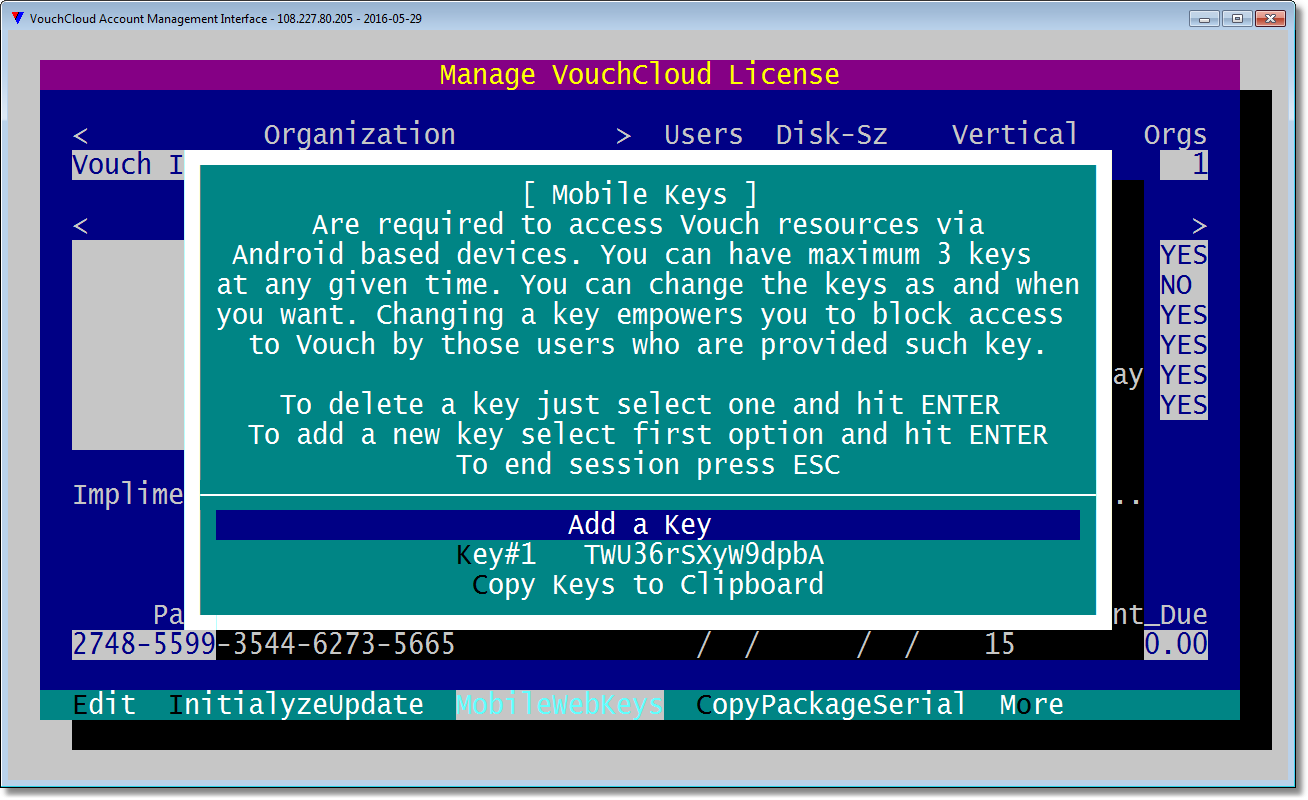
15 |
Stay on <MobileKeys> option at the menu at bottom and press <Enter> or press "M" key on the keyboard. You will see what is shown on the right.
Cursor is staying at <Add a Key>. Press <Enter>. |
|
16 |
Key#1 now appears in the middle of <Add a Key> and <Copy Keys to Clipboard>.
You can have upto 3 keys at any given time. Press <Enter> on <Add a Key> two more times. |
|
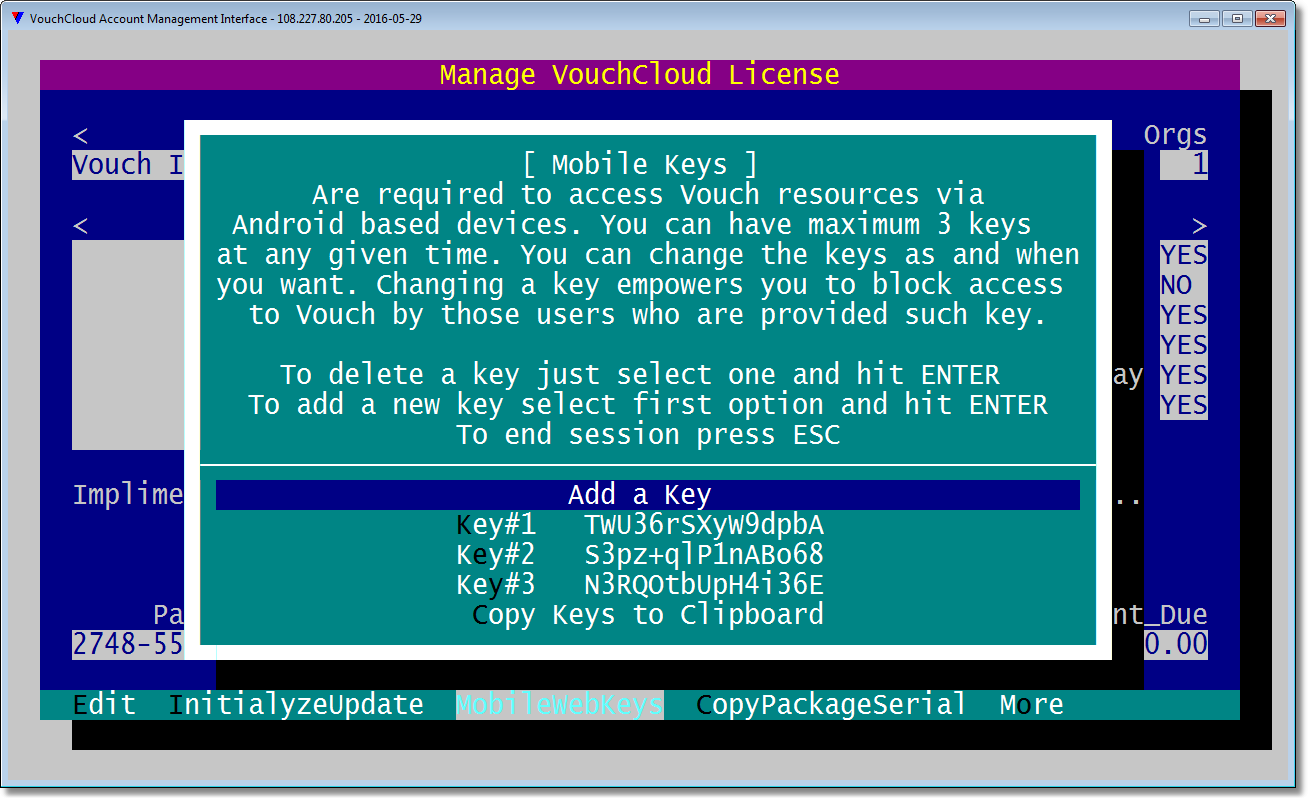
17 |
You have reached the maximum limit of keys available at any given time.
Try to press <Enter> once more on <Add a Key>. |
|
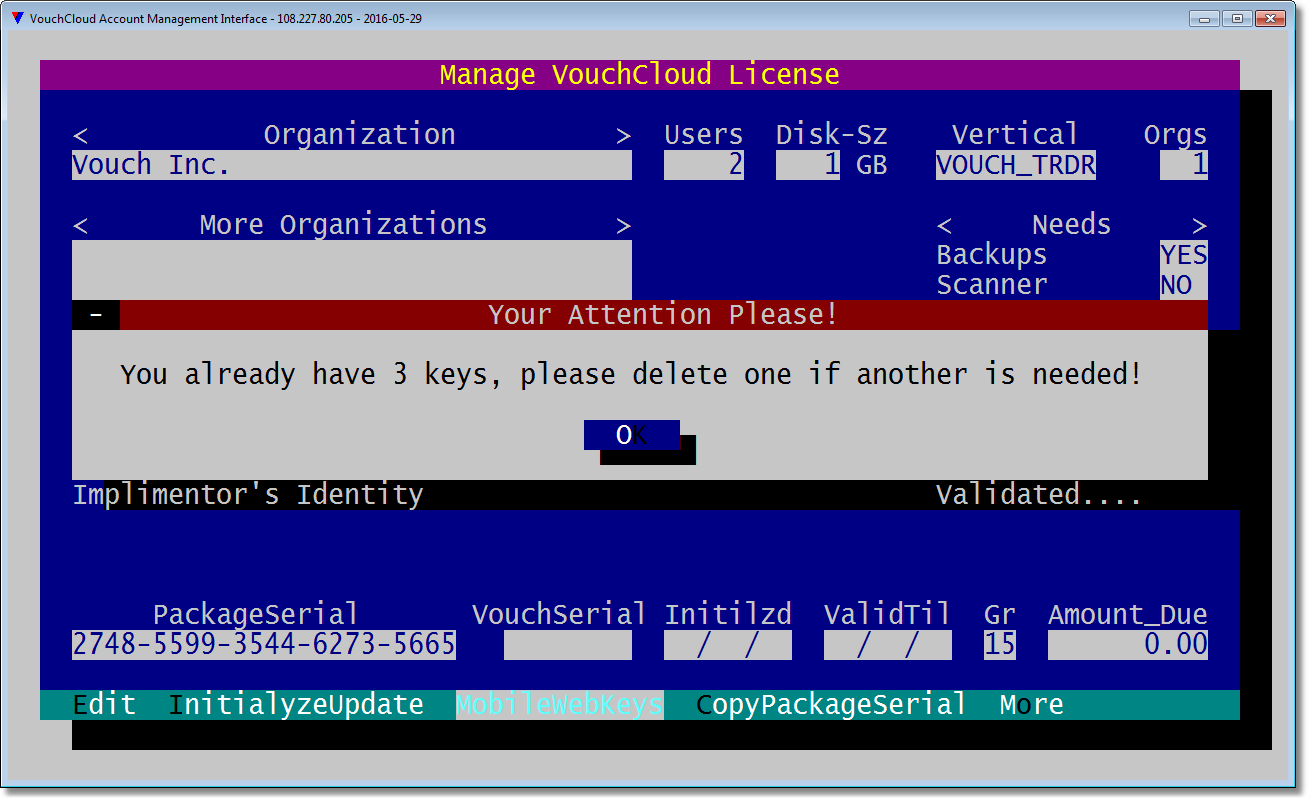
18 |
You will be informed that no more keys can be added.
At this point you have the option to delete some key and add another one. Do so if that's the requirement.
NOTE: You can change keys at any time in the future depending upon your needs. Deleting a key will disable any access to your data by anyone who is provided deleted key for web/mobile Vouch access. You can use it effectively where short-term access to a set of users is desired. This topic is explained in detail in other chapter.
When you are done with keys press <Esc>. You will be prompted to confirm you action. Choose <Yes>. |
|
19 |
We are ready to initialyze/update our account credentials.
Stay on <Initialyze> menu option and press <Enter> or press the letter "I".
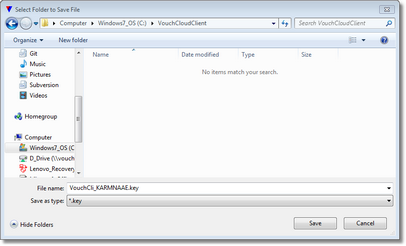
If the initialization process is carried successfully by VouchCloud admin-server then you will receive a VouchCli_{KARMNAAE}.key through windows Save File dialog. Navigate to the folder where VouchCloudClient is installed and click on <Save> button.
You just have received administrative key which is consumed only to connect you with Vouch where you can setup Vouch for initial access and create end-user keys for your organization.
The file name of the key file would be different that we received through file save dialog. "VouchCli_" + {server_location_identification} + ".key". {server_location_identification} for our documentation purposes arrived as "KARMNAAE". It will be different for you. Prefix "VouchCli_" and suffix ".key" will be same for every account.
You just have received administrative key, and as the description implies, you must never give access of this key to anyone. Create end-user keys via this key and distribute them to your end-users. |
|
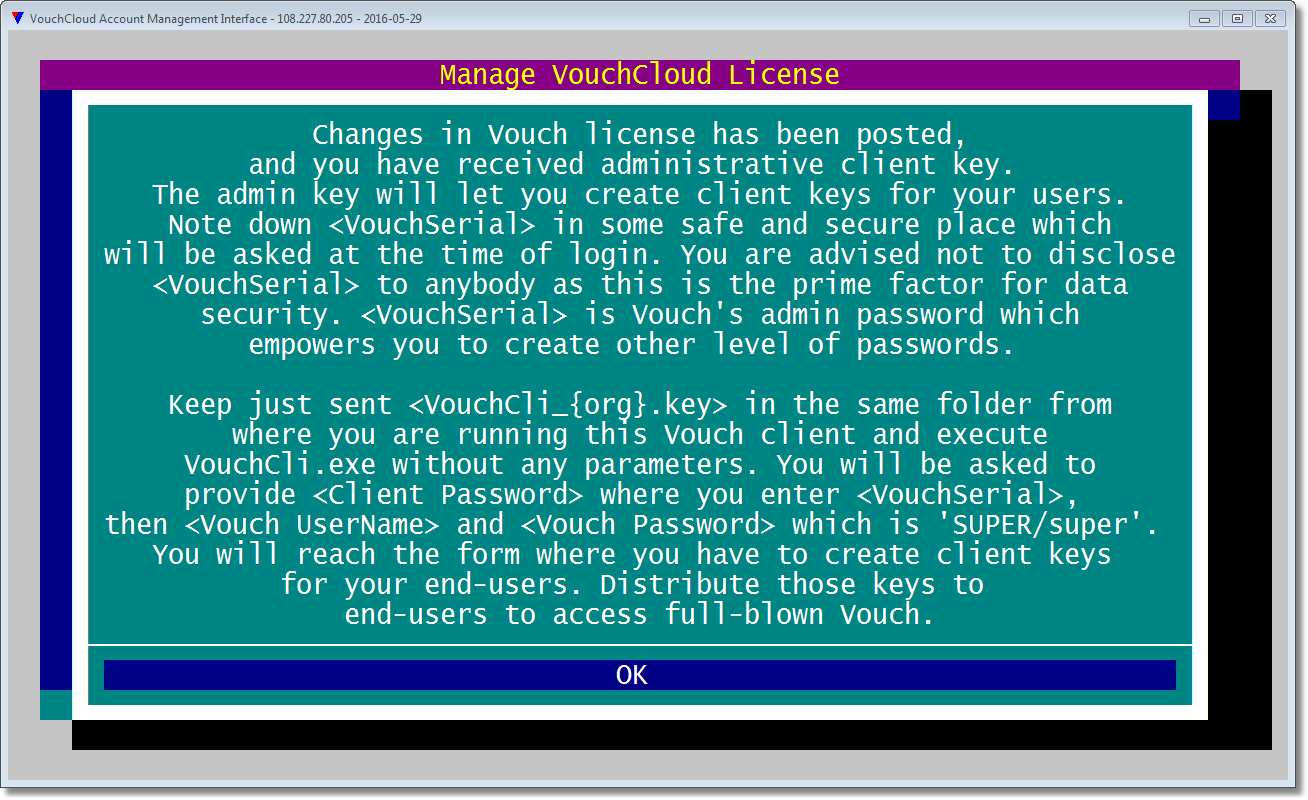
20 |
The message displayed at the right will appear after a successful <Initialize>ation of your VouchCloud account. Please read it carefully. It is self explanatory. |
|
21 |
After reading the above notification you reach to this stage. Here you can see that fields in the bottom line of the screen, i.e., VouchSerial, Initlzd, ValidTil are filled. It confirms that you are ready to prepare, explained in next section, Vouch for end-user access.
<VouchSerial>, which for documentation purposes, is "Wc3FC6E4". VouchSerial is the administrative password of Vouch and you not reveal this to anyone except who is responsible to configure Vouch. VouchSerial is also required to login through administrative VouchCli_{org}.key you received in previous step.
Follow the next section <How to Prepare Vouch for Cloud Access> if you have not done it already. As we said earlier, <Initialyze> is synonymous to <Update> also, this is quiet possible that you already have cofigured Vouch for your end-user use. You have to use <Initialize> option whenever you add another organization or want to change other parameters (which at this moment of writing are fixed but are scheduled to be made available soon), i.e., switch on/off Backups, Scanner, Designer, Dashboards, MobileGateway, Developer, and extend ValidTill period. |
|
|
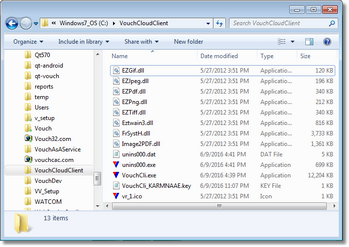
After receiving administrative key per step#19 the contents of the folder where VouchCloudClient installation is hosted will almost look like the one depicted in image at the right.
You can see that VouchCli_KARMNAAE.key is deposited there.
|
|